Creating MS Word templates for Swiss post red and orange payment slips
Emin Gabrielyan
2008-09-02
Switzernet
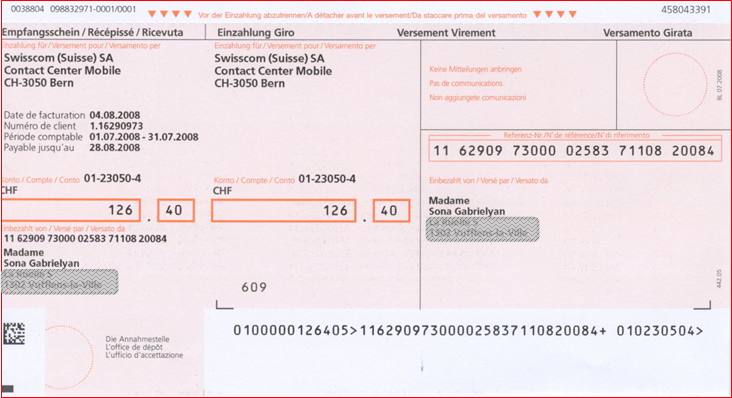
In this document we provide instructions on how to create an A4 format MS-Word template for Swiss post’s red or orange payment slips. Below is an example of orange payment slip. When printing the slips, the amount and the details of the invoice (are retrieved from a database and) are printed individually for each customer. The reference number exists only for orange payment slips. Red slips do not have a reference number.
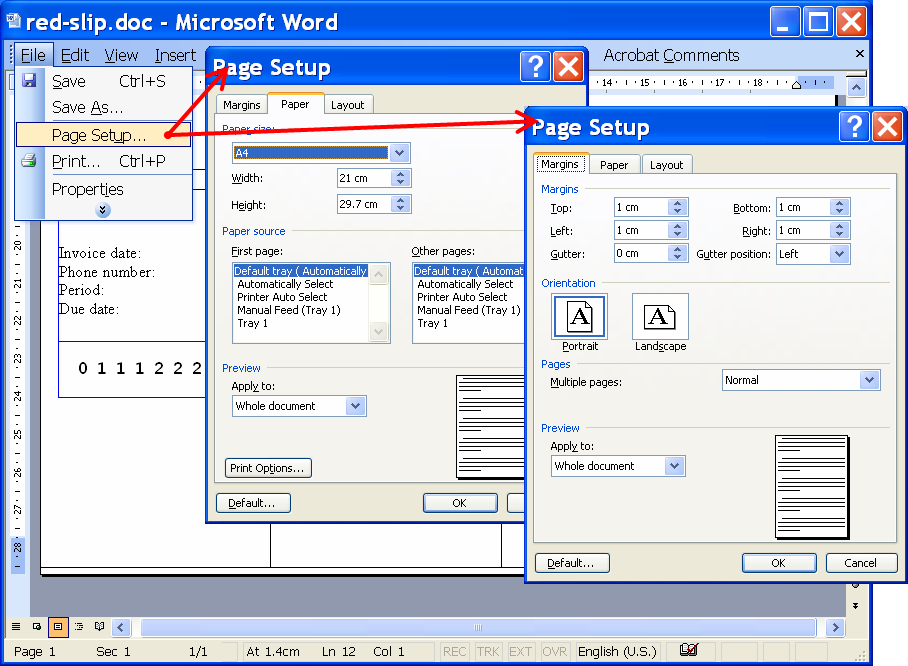
We demonstrate an example of a template, created for printing the invoice details and amounts on red payment slips. Start creating your MS-Word template. Make sure that the paper size is A4:
First we need to create a table with three columns and two rows. We chosen red borders for distinguishing the main table from the nested tables (to be created later). The main (red-bordered) table represents the area of the red payment slip located at the bottom of the A4 paper. In border and shading format menu, choose the thinnest border width (1/4 pt). The tick borders influence on the way how the size of the table is computed. In the very final version, before printing on piles of payment slips, you have to remove all borders. However, you shall print borders on test samples for controlling the alignment of lines. In table properties menu chose a vertical and horizontal positioning of the table relative to the top-left corner of the page. Set the horizontal shift equal to 0 cm and the vertical shift equal to 19 cm (this is the position of the postal payment slip’s area on the A4 paper).

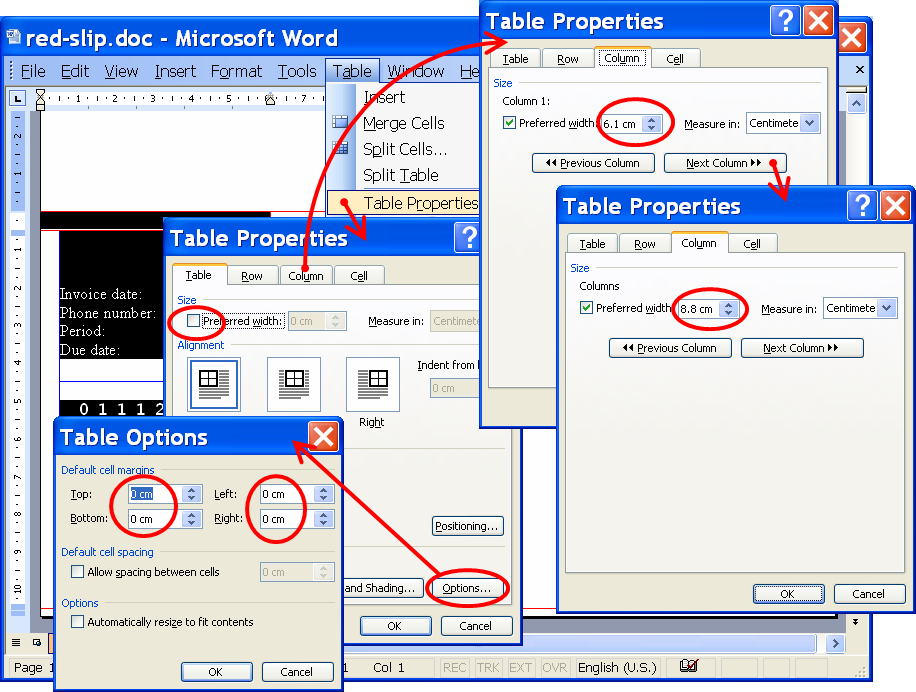
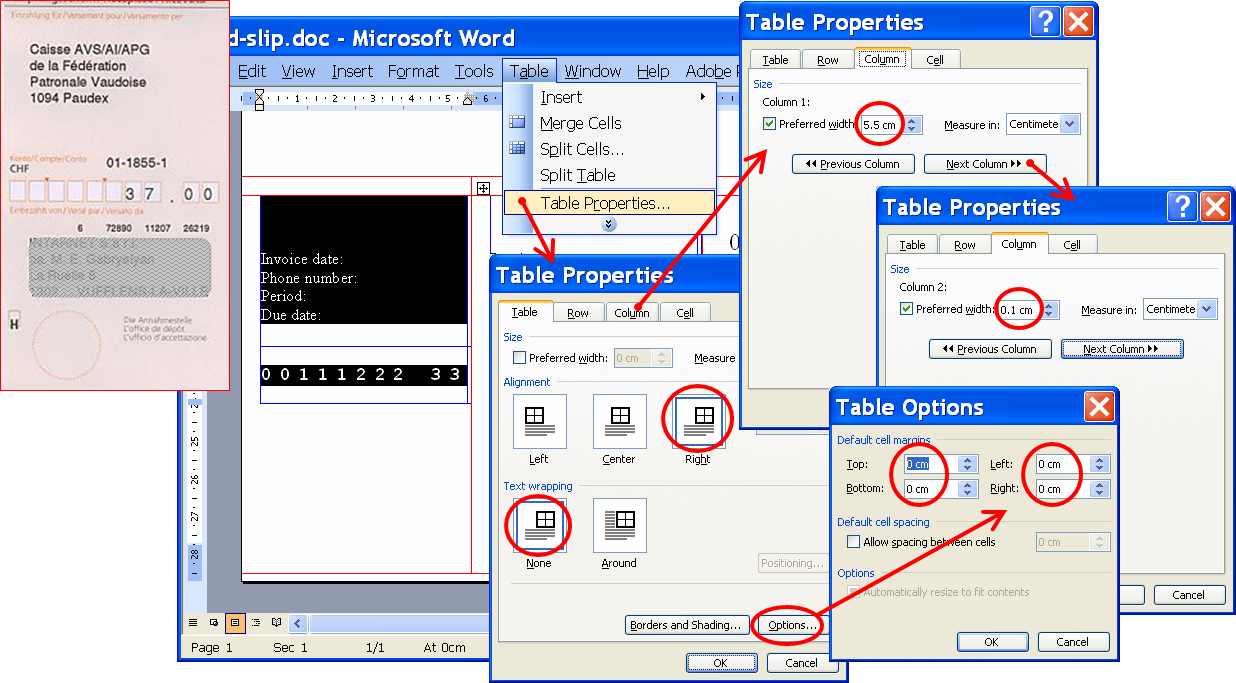
In table properties make sure that the table itself does not have a preferred width. Its first two columns must have a width equal to 6.1 cm and the last third column’s width must be equal to 8.8 cm. If you forget to remove the preferred width of the table, the Word will make an arrangement of widths, taking into account the entered widths for the columns and for the table (which is not what we want).
In the main table options set all four default cell margins equal to 0 (not zero by default).
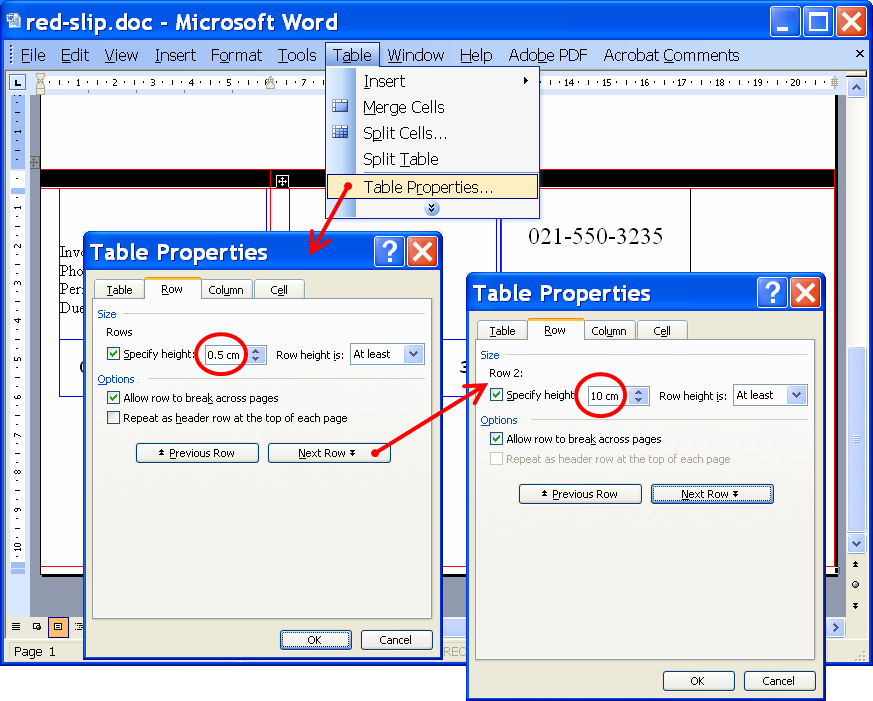
Select the first row of the table and set its height equal to 5 mm. Set the height of the second row equal to 10 cm. Make sure that the font size of the text of the first row (even if the cells contain no text) is not too large in order to keep the height of the row beyond the limits of 5 mm (12 pt Times New Roman is the limit).
Once the main table is created, it is the time to create nested tables inside the cells of the main table in order to position numbers and texts within the area of the red payment slip. In our example these tables have blue borders (choose the very thin border widths). The postal payment slips reserve 11 digit cells for entering the amount. The two last cells are for the centimes. The cell before the centimes is empty, and is reserved for the decimal point. The preceding 8 cells are reserved for the amount in Swiss francs. The space between the digits is equal to 5 mm on the postal payment slip samples. Therefore the width of the column of the nested (blue-bordered) table must be set to 5.5 cm = 11 x 5 mm. All four cell margins of the table are set to 0 (not zero by default). The blue table is aligned to the right. The second column of 1 mm in width aligns the position of the amount in the table with the positions of digit cells of the postal payment slip.
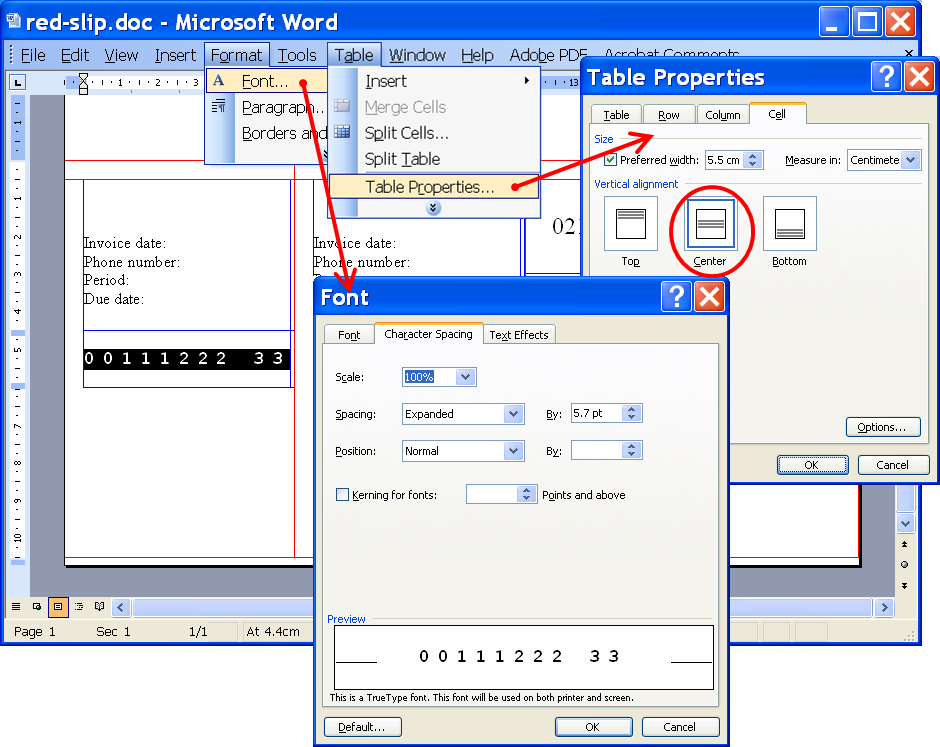
For printing the amount value, use a fixed-width font, such as “Courier New”. Replace the decimal point by a space. With a fixed-width font, the space will take the same width as digits (following the layout of the postal payment slip). Use a character spacing to fully extend the 11 symbols (10 digits and a space) to the 55 mm width of the table column. With such spacing, the printed digits will fall into the digit-cells of the postal payment slip.
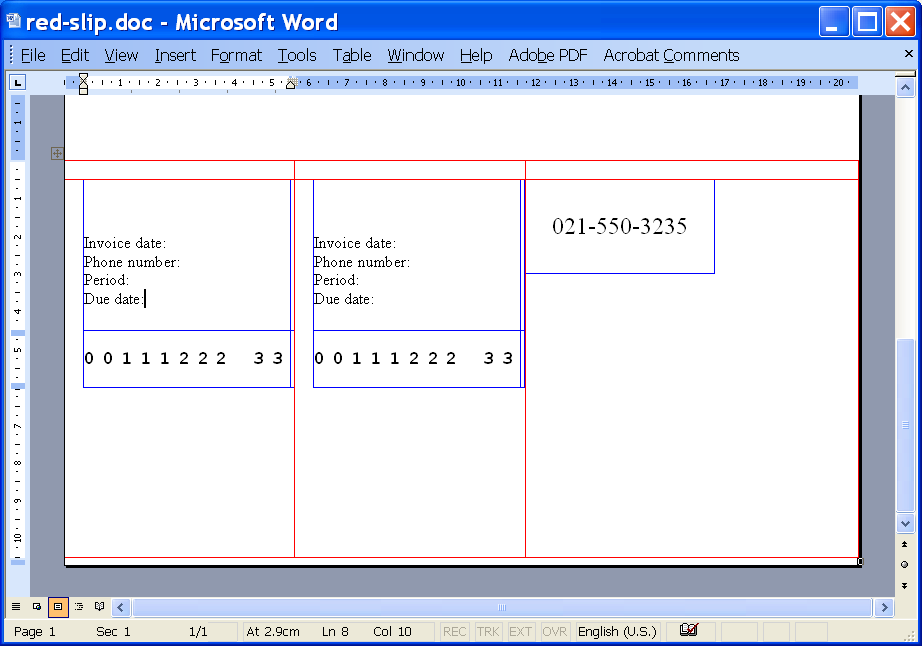
Check the rest of the parameters of the presented sample in the MS-Word document provided for downloading.
[doc]
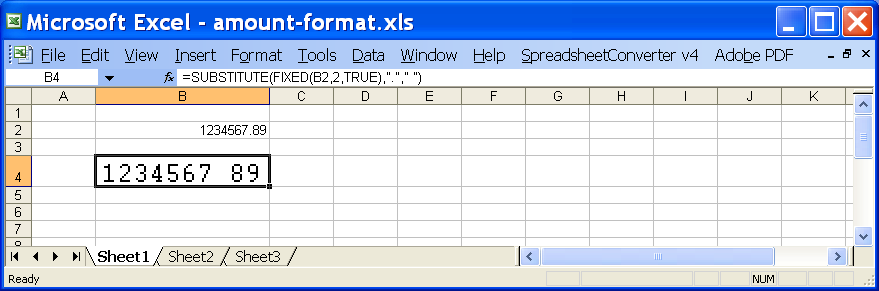
The MS-Word file will be usually merged to the excel file containing the users’ database with the amounts. The excel file shall provide a ready-to-print value of the amount, where the decimal point is already replaced by a space sign. The following excel formula can be used for such a conversion “=SUBSTITUTE(FIXED(B2,2,TRUE),"."," ")” within the excel file, before parsing to MS-Word file.
[xls]
* * *
References:
http://www.bis.org/publ/cpss53p13ch.pdf
http://www.postfinance.ch/pf/content/en/seg/priv/prod/pay/national.html
http://www.postfinance.ch/pf/content/en/seg/biz/product/pay/debsolution/inpay/offer.html
http://google.ch/search?q=Swiss+postal+red+orange+payment+slips
http://switzernet.com/public/080302-postfinance-xml2doc/
http://unappel.ch/public/080302-postfinance-xml2doc/
http://switzernet.com/public/080803-customer-stamps/
http://unappel.ch/public/080803-customer-stamps/
Format of orange postal payment slips:
http://switzernet.com/company/080111-orange-payment-slip/
Red slip layout (this document):
http://switzernet.com/public/080902-layout-red-slip/
http://unappel.ch/public/080902-layout-red-slip/
![]()
Copyright © 2008 Switzernet